The Author – Bart Busschots
Creative Commons
Unless otherwise stated, the content on this site is licensed under Creative Commons Attribution, Noncommercial, No Derivative Works 3.0 License


Jan
8
We have now learned enough HTML to encode basic page content, marking things as headings, paragraphs, lists, etc.. We have completely ignored the look of our pages so far – relying on our browsers’ default styles. The default styles, it’s fair to say, are pretty darn ugly, which is why almost every page on the web has at least some basic styling applied to override these defaults.
In the bad old days, HTML pages were styled by adding attributes directly into the HTML tags. This was very time-consuming, and it greatly reduced the re-usability of the HTML markup. Those attributes still exist in the HTML spec, but we have completely ignored them, and will continue to do so for the entire series. This is not the bad old days, so we now have access to a much better solution – Cascading Style Sheets, or CSS.
Dec
30
Pretty Markdown & HTML Links With TextExpander & Perl
Filed Under Computers & Tech, Software Development, Automation | 7 Comments
What’s the problem to be solved? When doing show notes for the various podcasts I contribute to, I generally have to include a lot of links. Particularly for Let’s Talk Apple and the Security Stuff segment on the Nosillacast, I want to clearly show where the news story came from. I also want to keep the link text short. To balance those two requirements, I decided to use the domain part of the URL with /... appended to it as the link text. Doing this manually would be a really big pain in the backside because there are often more than 50 links in the notes for a single episode! Clearly, this needed automation.
I do my show notes in Markdown, so my initial solution produced links in Markdown format. Allison asked me how I did my links, because she thought they looked good, and she assumed I would have automated the process in some way. I explained my solution, and she asked if I could build a variant for her that generates the same style of links in HTML format.
My solution is built using a number of building blocks, but the glue that holds it all together is TextExpander. TextExpander is a paid-for Mac-only app, but one I would argue is well worth the price of admission. TextExpander is one of the first things I install on every new Mac.
TextExpander’s raison d’être is to monitor everything you type, looking for abbreviations you have defined, and replacing them with expansions you have defined as you type. Each of these abbreviations/expansion pairs are referred to as snippets within TextExpander.
Snippets can be very simple replacements like expanding *bb into Bart Busschots, but they can also be much more complex. The next level up would be to include special codes to inject data into the replacements, for example, I have a snippet that replaces *di with the current date and my initials, the content of that snippet is %d-%m-%Y BB – %d gets replaced with the day part of the current date, %m the month part of the current date etc.. The next level of complexity is that you can include special codes to make TextExpander popup a little form when ever you type the abbreviation into which you then fill in information that gets included in the replacement text.
However, the thing that really makes TextExpander powerful in my mind is it’s ability to execute a script to generate the replacement text. The scripts can be written in AppleScript, JavaScript, and any scripting language supported in the OS X terminal. This allows TextExpander to utilise the full power of the Terminal, as well as the full power of scripting languages like Perl, Python and Ruby.
Unsurprisingly, I like to use Perl in my snippets, and in this case, I use Perl to reach out to the pbpaste terminal command, and to harness the power of the URI perl module.
I use my solution as follows:
- Copy the link to be included in the show notes to the clipboard
Cmd+tabto the show notes I am working on and type the abbreviation*mdlcinto the place in the notes where I want the URL to be inserted (all my Markdown expansions start with*md, andlcstands for linkify clipboard).- The TextExpander snippet then executes – it fetches the URL from the clipboard, parses it with the
URIperl module, and assuming that succeeds, generates the Markdown code for the link, and inserts it into the show notes in place of the*mdlcabbreviation.
Dec
27
Up until now we’ve only encountered very simplistic HTML tags, and we have ignored the fact that many HTML tags can specify attributes. In this instalment we’ll look at two tags that require attributes – those for inserting images into pages, and those for inserting links into pages. Before we can look at the two tags in question, we need to lay two pieces of ground-work – we need to discuss attributes in HTML tags, and we need to discuss URLs, and particularly the difference between relative and absolute URLs.
Dec
23
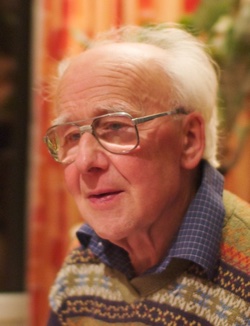 My Grandfather had a big influence on my life, and all for the better. Unfortunately, he passed on Saturday night after a short illness. I took the time to mark Steve Jobs’ passing on this blog, even though I never met the man, so I want to do the same for my Grandfather. This is not a definitive history of the man, just three important ways in which he has, and will continue to, influence my life.
Firstly, computers are kinda my thing. Everything on this site I do for fun, and you’ll see that almost all of it involves computers. I also make my living as a sysadmin, so yet more computers! Well, all that started when my Grandfather became the first person in my life to get a personal computer (an Amstrad 8086). Granddad taught me how to use DOS, and later Windows, and our first family computer at home was a hand-me-down from Granddad – a Comodore 368 clone with a 16MHz CPU, 4MB of RAM, and a 40MB HDD. The first computer that was all mine was also a hand-me-down from Granddad – a 75MHz Pentium with 16MB of RAM, and two (then) massive 500MB HDDs.
Myself and Granddad were the only computer nerds in the family – sure, others use computers, but only as a means to an end. When any of the rest of my family start a conversation with me about computers it’s because something is not working, or about to be purchased. Granddad on the other hand would start conversations about computers just to tell me about some cool new thing he bought, downloaded, or read about. A lot of people are intimidated by the relentless march of technology, but Granddad revelled in it – as do I.
Being an octogenarian computer nerd is pretty forward-thinking I think you’ll agree, but my grandfather was forward thinking in other ways too. Simply put, a gay grandson could not have asked for a more accepting grandfather.
Finally, something myself and all my brothers agree on is that when it comes to marriage, we could not have asked for better role models than my grandmother and grandfather. They were together for almost 65 years, and they were inseparable. They did just about everything together, and pretty much always walked arm-in-arm where ever they went. Literally, in sickness and in health, they were always there for each other. I hope I can be as good a husband to my beloved as he was to my grandmother – I know it’s gonna take a lot of hard work to live up to his example!
Dec
15
hsxkpasswd Without sudo (with perlbrew)
Filed Under Security, My Projects, System Administration, Computers & Tech | 2 Comments
While it’s very easy to install hsxkpasswd onto your system from CPAN – it’s literally just one command (see below) – it requires administrator access to the machine.
sudo cpan Crypt::HSXKPasswd
This is all well and good if you have administrator access and are sure you want the module installed system-wide. But, what if you don’t have admin access, or, what if you just want to experiment with the module in your own home directory? The answer is perlbrew, a system for running custom versions of Perl inside your home directory. No need for sudo, and what ever you install with perlbrew is entirely contained within your home directory. If you already have perlbrew installed and configured with a version of Perl greater than or equal to 5.16, you can skip to the final step. If not, you’ll need to make your way through all the steps.
Step 1 – Install perlbrew Into Your Home Dir
There are a few different ways of installing perlbrew, but I find the following method the simplest:
curl -L http://install.perlbrew.pl | bash
That should install perlbrew into your home directory, and it should tell you to append some code to the end of your ~/.bash_profile file, which you can do with the following command:
echo 'source ~/perl5/perlbrew/etc/bashrc' >> ~/.bash_profile
Once that’s done, close your Terminal window and open a new one (this is to pick up the new environment variables defined in ~/perl5/perlbrew/etc/bashrc). You’ll know the install has been successful if you can run the perlbrew command:
perlbrew version
Step 2 – Install a Compatible Version of Perl into perlbrew
The joy of perlbrew is that you can have as many versions of Perl installed at any one time as you like, and you can then switch between them with the perlbrew command.
You can install Crypt::HSXKpasswd, and hence the hsxkpasswd terminal command, into any version of Perl greater than or equal to 5.16.
The following command will install Perl 5.16 into perlbrew:
perlbrew install perl-5.16.0
Go off and make yourself a cup of your favourite beverage – this will take a while! 🙂
Once the install finally finishes, you can activate that version of perl (just on your account) with the command:
perlbrew switch perl-5.16.0
It’s important to note that if at any stage you want to disable perlbrew and get back to the default system version of perl, the command to do so is:
perlbrew off
Step 3 – Enable the perlbrew CPAN Client
If you haven’t already done so, enable the perlbrew CPAN client cpanm with the command:
perlbrew install-cpanm
Step 4 – Install Crypt::HSXKPasswd
Once you have perlbrew installed and configured with a compatible version of perl, you can install Crypt::HSXKPasswd with the following simple command:
cpanm Crypt::HSXKPasswd
You’ll know it’s worked if you can run the hsxkpasswd terminal command:
hsxkpasswd --version
Dec
1
The slides for my talk to Astro2, the Astronomy & Physics society of Maynooth University.

The slides refer to demo scripts. These are scripts for the free and open-source planetarium software Stellarium. You can download the scripts here, and you can get instructions on how to install the scripts into Stellarium on their documentation wiki – specifically, you’ll need the section on file locations, and the section on installing scripts.
Nov
20
In the previous instalment we introduced the concept of block-level tags, and inline tags. Block level tags define blocks of text like headers, paragraphs and lists, and starting a new block-level tag generally starts a new line in the page. Inline tags on the other hand effect a part of a block, and opening an inline tag generally doesn’t start a new line. In the previous instalment we looked at some of the most important block-level tags, in this instalment we’ll look at some of the most common inline tags.
Nov
5
In the previous instalment we introduced HTML, learned about HTML tags in the abstract, and looked at a basic template for all HTML pages. Over the next few instalments we’ll be working our way through the common HTML tags.
There are two major types of HTML tags, block-level tags, and inline tags, though it should be noted that there is a much less common third type which is a hybrid of the two, referred to as inline-block. For now, we’ll be ignoring these odd-balls.
Block level tags define regions of content – things like titles, paragraphs, lists, list items, and so on. Inline tags affect parts of a block – for example, a few words within a paragraph can be marked for emphasis. With practice the distinction will be comes obvious, especially when we get to the more advanced aspects of CSS, but the different in type can be confusing. A handy way of remembering the difference is that opening a new block-level tag will always start a new line on your page.
In this instalment we’ll start with some of the most common block-level tags.
Oct
23
The first baby-step we’ll take towards real programming is the Hyper-Text Markup Language, better known to us all as HTML. HTML is not a true programming language, it is instead a simpler beast known as a markup language – it adds context to text. HTML allows us to mark certain parts of a document as headings, other parts as paragraphs, and yet other parts as being emphasised etc.. Like with programming, we are conveying meaning to the computer, but the range of possible things we can ‘say’ is much smaller and simpler.
Modern best practices for web development are the result of decades of evolution. We’re going to ignore all the techniques that time and experience have shown to be mistake, and jump straight to the end of the story – modern best practice. There have also been many versions of HTML over the years, and again, we’re going to jump straight to the end of the story, and use the latest incarnation of the Hyper-Text Markup Language, HTML5.
Before we dive into the specifics, I want to take a moment to explain the larger context in which we’ll be using HTML. When HTML was originally developed, it was designed to describe both what different elements of a web page were, and, what they should look like. Experience has taught us that this is a terrible idea, so we no longer use HTML in this dual role. Instead, HTML is now just half of a duo of languages used to create a web page – the other partner being Cascading Style Sheets, or CSS. We use HTML to describe what each part of the page is, and CSS to describe how each marked up element on the page should be styled.
We’ll be moving on to CSS once we finish describing HTML. Until we get CSS, the web pages we create will look exceptional plain and frankly boring, but don’t worry, we’ll move on to CSS soon enough, and then you can really let your creative juices fly!
Oct
9
PBS 1 of X – Introduction
Filed Under Software Development, Computers & Tech | 17 Comments
Computer programming is a very powerful skill – it literally lets you tell computers exactly what to do. Contrary to what you may believe, learning to program is not about learning any specific programming language, but about learning the principles shared by all languages. Once you grasp the fundamental principles, you can move from language to language with relative ease. In my two decades of programming I have programmed in X86 Assembler, BASIC, C, C++, Java, JavaScript, Perl, PHP, BASH, Lisp, Maple, Matlab, and more. While doing so I’ve also made use of other computer languages that are not quite programming languages, but still involved telling a computer what you mean like SQL, HTML, CSS, XML & JSON. The point I really want to drive home is that you are not a Java programmer, or a PHP programmer, or a Perl programmer – you are a programmer! The tool you happen to use most today is unlikely to be the one you use most a decade from now. 15 years ago I did 90% of my programming in Java, 10 years ago, PHP, today, Perl, next year, who knows!
In case you hadn’t guessed yet, I’m not going to pick a single computer language for this series of tutorials. I’m very deliberately going to make use of a pallet of languages, and I’m going to focus on the underlying principles, rather than the specific peculiarities of any given language.
In order to help bring everyone along, I’m also not going to go from zero to real programming in one go. The plan is to sneak up on programming in small steps – hence the title of the series. We will be using computer languages from the start, but initially, they won’t be programming languages. Also, in order to be as inclusive as possible, I’m going to avoid vendor-specific languages – that means no Apple Script, no VB Script, no Objective C, and no C# (pronounced ‘see-sharp’ BTW). Instead, I’m going to use the most universal platform of all – the world wide web. We’re going to sneak up on programming by learning to create web pages.